
As a homeowner, you take pride in your outdoor space, and your deck is no exception. A well-maintained deck can be a beautiful extension of your home, providing a perfect spot for relaxation, entertainment, and making memories with family and friends. However, over time, your deck can start to show signs of wear and tear, and that's where staining comes in. In this article, we'll explore the process of staining your deck to make it last longer, and provide you with some valuable tips and tricks to get the job done right.
Why Stain Your Deck?
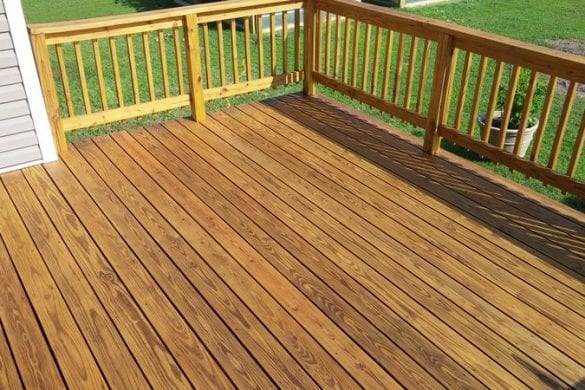
So, why is staining your deck so important? For starters, it helps to protect the wood from the elements, such as sunlight, rain, and snow. Without a protective coating, your deck can start to rot, warp, and become discolored, which can lead to costly repairs down the line. Staining your deck also helps to enhance its appearance, bringing out the natural beauty of the wood and adding a touch of color to your outdoor space. Plus, a well-stained deck can increase your home's curb appeal and even boost its value.
Before we dive into the staining process, it's essential to choose the right stain for your deck. There are many different types of stains available, each with its own unique characteristics and benefits.

Preparing Your Deck for Staining
Once you've chosen the perfect stain for your deck, it's time to start preparing the surface. This is a crucial step, as a well-prepared deck will ensure a smooth and even finish. Start by clearing your deck of any furniture, plants, or other items that could get in the way. Next, sweep the deck to remove any dirt, debris, or leaves that may have accumulated.
After cleaning your deck, inspect it for any damaged or rotting boards. Replace any boards that are beyond repair, and make sure all the remaining boards are secure and level. If you have any gaps between the boards, use a wood filler to fill them in and create a smooth surface. Finally, use a sanding block or orbital sander to smooth out the wood and remove any splinters or rough spots. This will help the stain penetrate evenly and ensure a professional-looking finish.
Applying the Stain
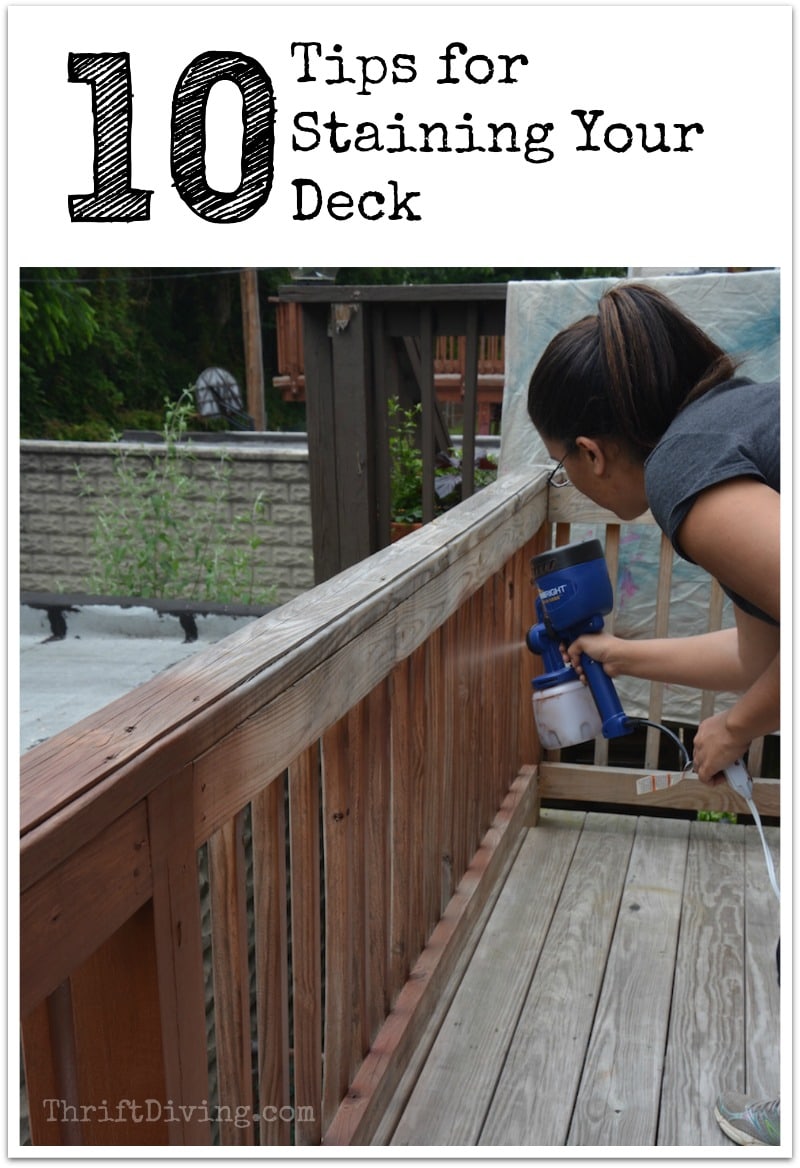
Now that your deck is prepared, it's time to apply the stain. Start by reading the instructions on the stain can and following any recommended safety precautions, such as wearing gloves and protective eyewear.

Apply the stain in a thin, even layer, using a brush to cut in around any edges or corners. Don't overload the brush with too much stain, as this can lead to drips and uneven coverage. Instead, work in small sections, using a clean cloth to wipe away any excess stain and prevent it from pooling on the surface. If you're using a roller, use a extension pole to reach high areas and a roller with a thick nap to get into tight spaces.
After applying the stain, allow it to dry according to the manufacturer's instructions. This can take anywhere from a few hours to several days, depending on the type of stain and the weather conditions.
Tips and Tricks for Staining Your Deck
Staining your deck can be a bit of a process, but with the right tips and tricks, you can achieve a professional-looking finish that will last for years to come. Here are a few tips to keep in mind: always read the instructions on the stain can and follow the recommended application process. Use a high-quality brush or roller to apply the stain, and work in small sections to maintain even coverage. Don't overload the brush with too much stain, and use a clean cloth to wipe away any excess stain and prevent it from pooling on the surface.
It's also essential to test the stain on a small, inconspicuous area of the deck before applying it to the entire surface. This will help you ensure the stain is the right color and won't damage the wood. Additionally, consider using a stain with a built-in sealant, as this can help protect the wood and extend the lifespan of the stain. Finally, be patient and don't rush the process – staining your deck takes time and effort, but the end result is well worth it.
In conclusion, staining your deck is a great way to protect it from the elements and enhance its appearance. By choosing the right stain, preparing the surface, and applying the stain with care, you can achieve a professional-looking finish that will last for years to come. Remember to follow the manufacturer's instructions, work in small sections, and use a high-quality brush or roller to apply the stain. With these tips and tricks, you'll be well on your way to a beautiful, long-lasting deck that you'll enjoy for years to come.
So, if you're ready to give your deck the protection and beauty it deserves, start by choosing the right stain and preparing the surface. With a little time and effort, you can achieve a stunning finish that will make your deck the envy of the neighborhood. And don't forget to maintain your deck regularly, as this will help extend the lifespan of the stain and keep your deck looking its best. Happy staining, and enjoy your beautiful, long-lasting deck!